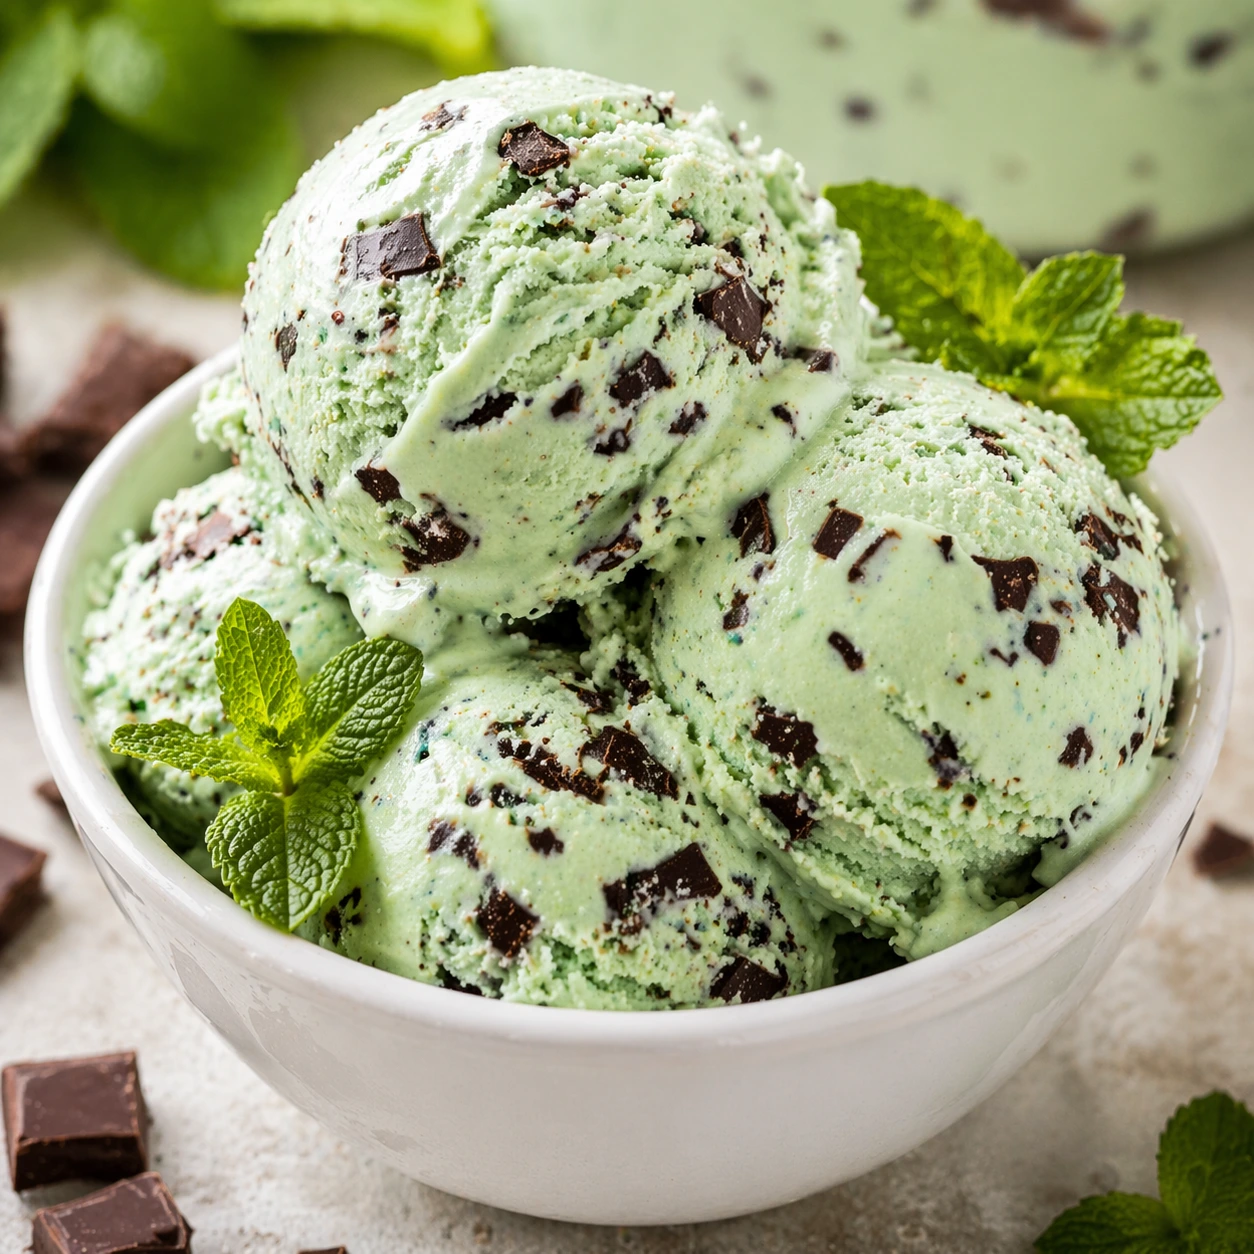
Last Saturday afternoon, with the thermometer pushing ninety degrees and the sun beating down on our front porch, my daughter burst through the door asking if we could make something cold and sweet together. I’d been thinking about mint all week after spotting fresh bundles at the farmers market, and suddenly, homemade mint chocolate chip ice cream felt like the only right answer. There’s something about that first spoonful of cool, creamy mint dotted with dark chocolate that takes me straight back to childhood summers, sitting on my grandmother’s back steps with a cone melting faster than I could lick it.
This easy mint chocolate chip ice cream recipe has become our family’s warm-weather ritual, a simple project that fills the kitchen with the sweet scent of vanilla and peppermint while we wait for the magic to happen. It’s the kind of dessert that doesn’t demand culinary school training or fancy equipment beyond a basic ice cream maker, yet it delivers that premium, ice cream parlor experience right in your own home. The bright, refreshing mint paired with little pockets of chocolate makes every bite feel like a celebration, and knowing exactly what goes into it makes it taste even better.
Table of Contents
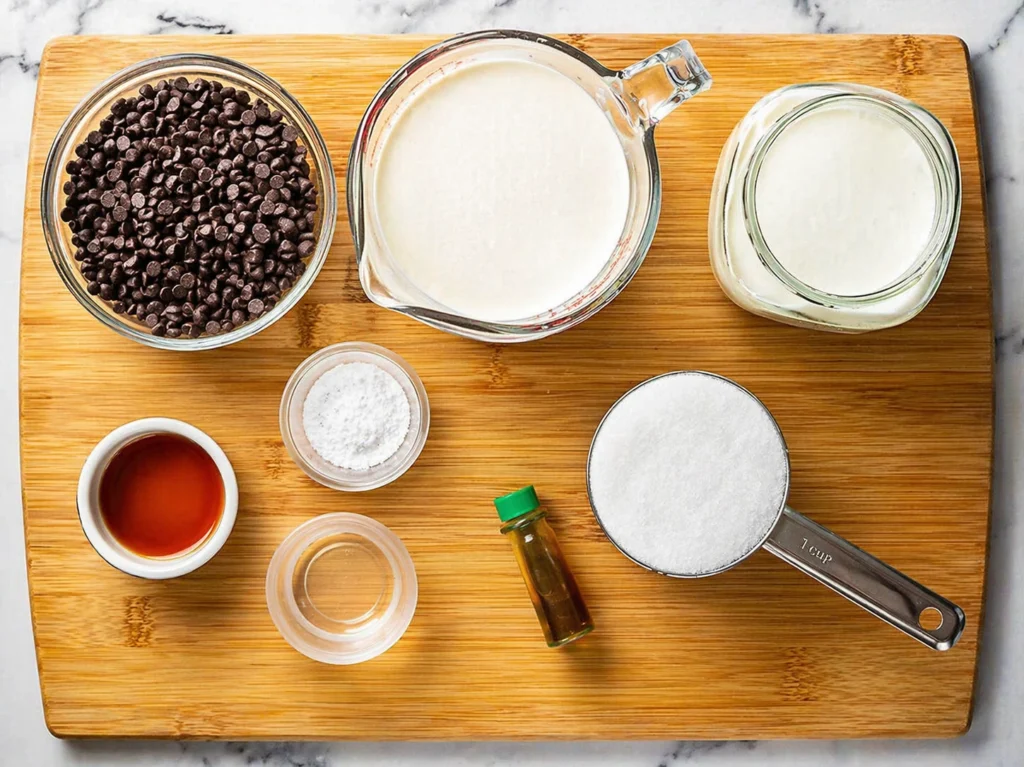
Essential Ingredients
- 2 cups 2% milk
- 2 cups heavy cream
- 1 cup sugar
- 1 teaspoon vanilla extract
- 1 teaspoon peppermint extract
- ½ teaspoon salt
- 3 drops green food coloring (Optional)
- 1 cup miniature semisweet chocolate chips
Preparation Steps (Step-By-Step Instructions)
Step One: Mix Your Base
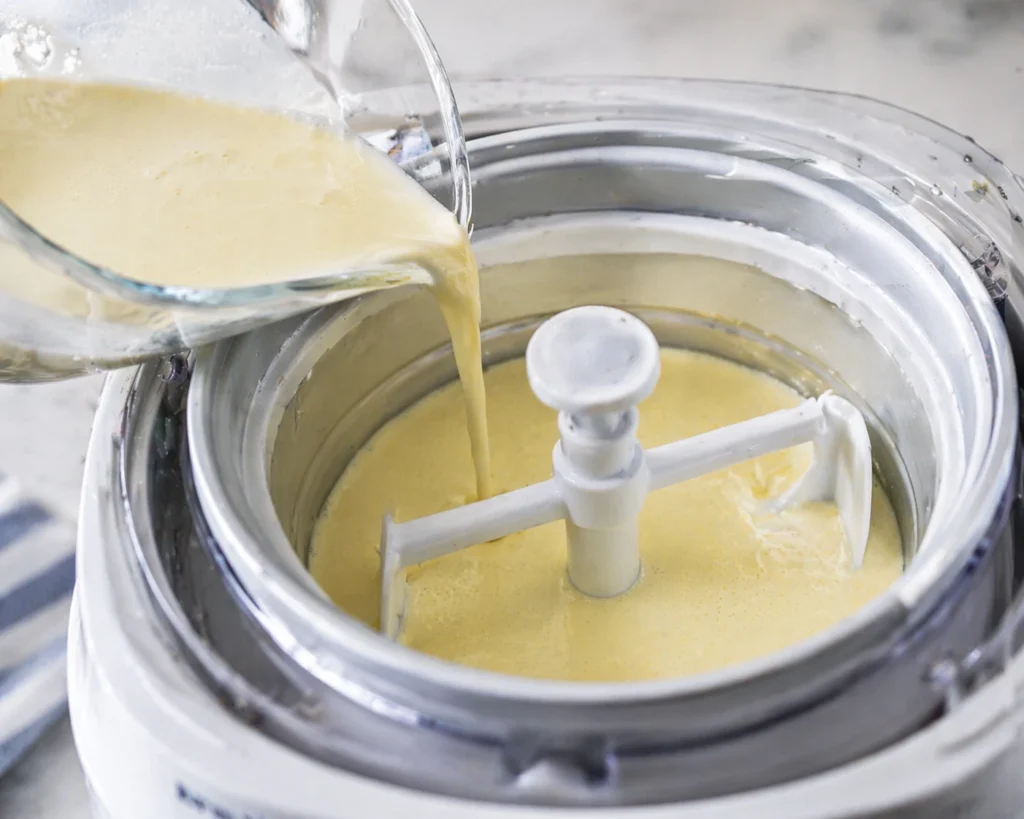
Gather all your ingredients and a large mixing bowl. Combine the milk, heavy cream, sugar, vanilla extract, peppermint extract, and salt. Whisk everything together until the sugar completely dissolves. This usually takes about two minutes of steady whisking. You shouldn’t feel any grittiness when you rub a bit of the mixture between your fingers.
Step Two: Add Color
If you’re using food coloring, add three drops of green coloring to your mixture and stir until the color is evenly distributed throughout. The mixture should be a pale, soft green that reminds you of early spring leaves.

Step Three: Churn the Ice Cream
Pour your mixture into your ice cream maker and turn it on according to the manufacturer’s directions. Different machines work differently, but most will churn for about thirty minutes total. The mixture will start thin and gradually thicken as it freezes and incorporates air.
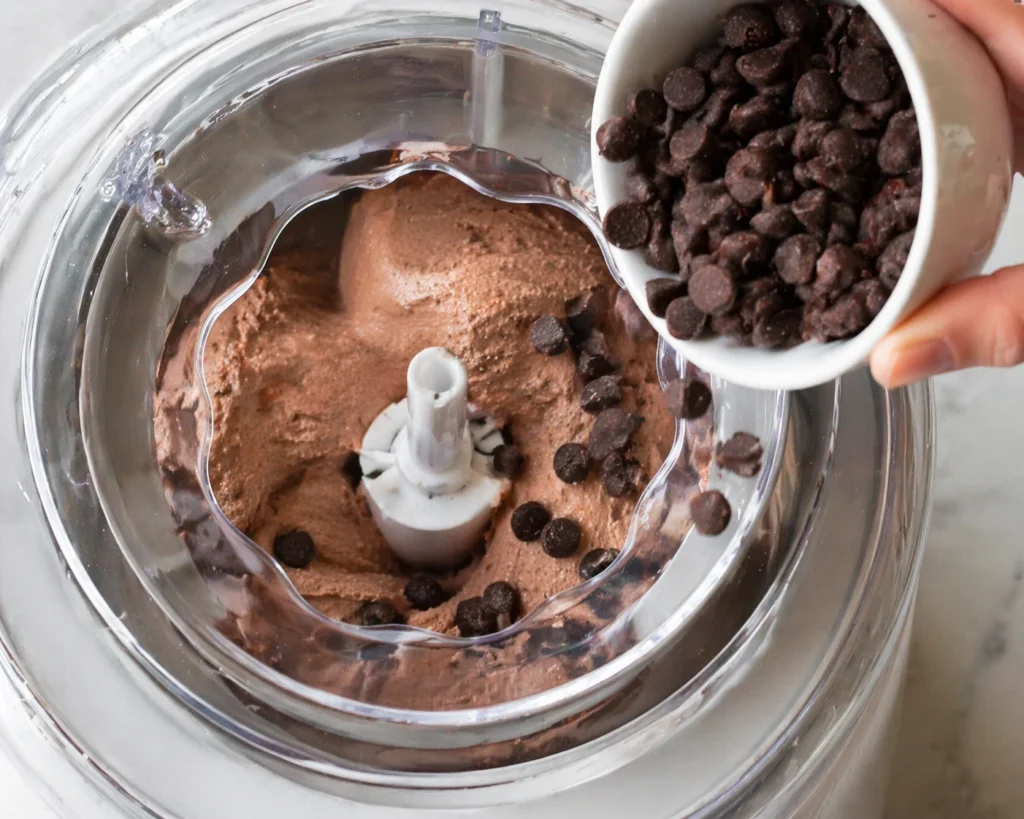
Step Four: Add the Chocolate
About ten minutes into the churning process, once the mixture has started to thicken slightly, add your chocolate chips through the opening in the lid. The machine will distribute them throughout the ice cream as it continues to churn. If you add them too early, they’ll sink to the bottom. Too late, and they won’t mix in properly.
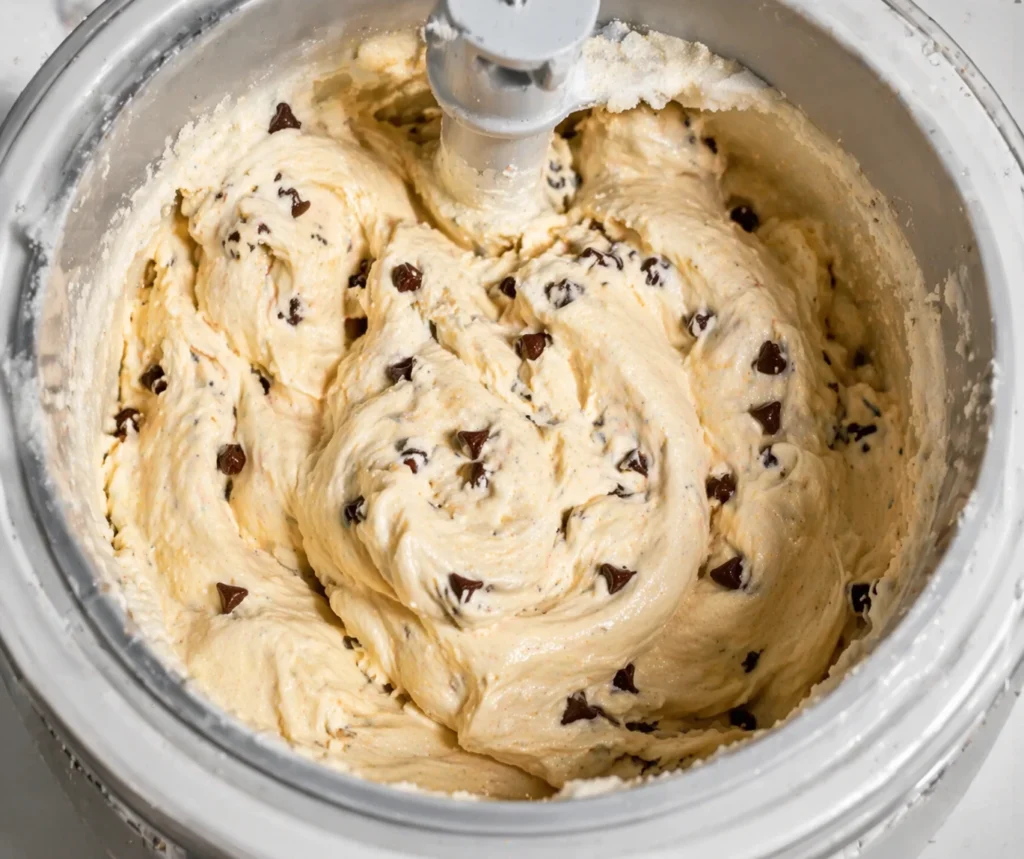
Step Five: Finish Churning
Continue churning until the ice cream reaches a soft-serve consistency, thick enough that it holds its shape but still creamy and smooth. This typically takes another twenty minutes after adding the chocolate chips.
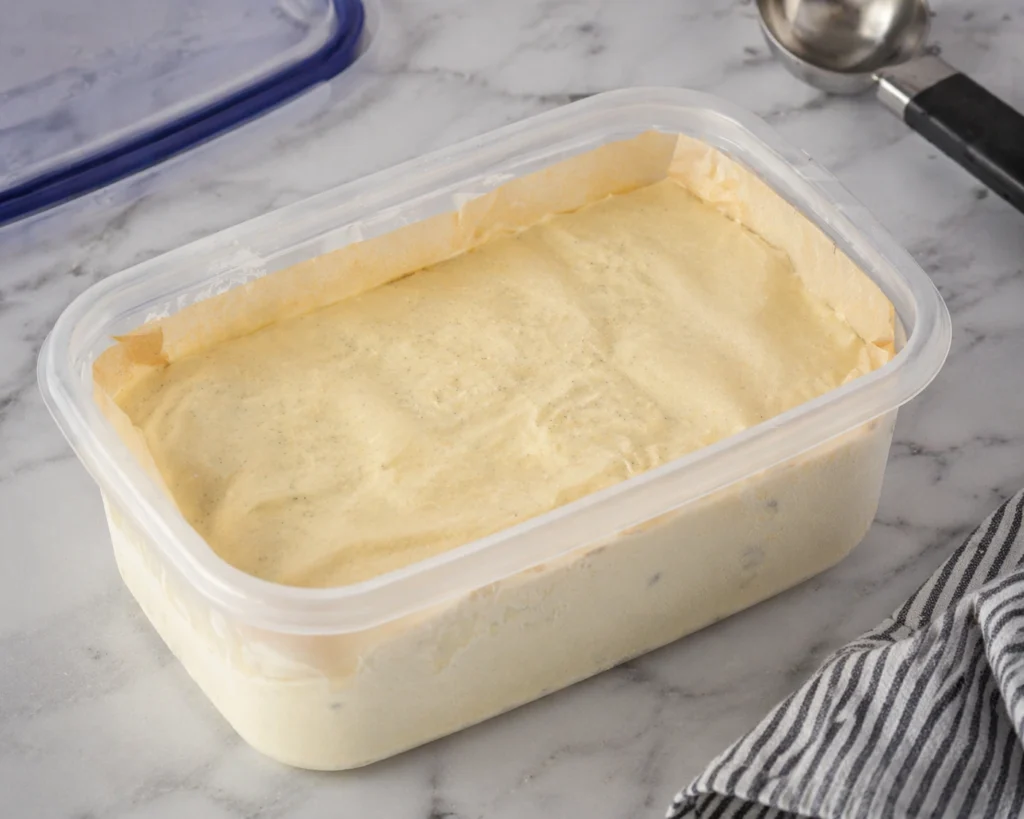
Step Six: Freeze Until Firm
Transfer your ice cream to an airtight, freezer-safe container. Press a piece of parchment paper directly on the surface to prevent ice crystals from forming. Freeze for at least two hours until firm enough to scoop properly.
Why You Will Love This Recipe
This homemade mint chocolate chip ice cream tastes fresher and more vibrant than anything you’ll find in the grocery store. You control the sweetness, the intensity of the mint, and the amount of chocolate in every bite. It’s a fun weekend project that gets everyone involved, from measuring ingredients to watching the ice cream maker work its magic. The satisfaction of creating something this delicious from scratch is genuinely rewarding, and you’ll love knowing there are no mysterious additives or preservatives in your dessert.
Expert Tips For The Best Result
Chill your ice cream base in the refrigerator for at least an hour before churning if you have time. A cold mixture churns faster and creates a smoother texture with smaller ice crystals. Make sure your ice cream maker bowl has been in the freezer for the full time recommended by the manufacturer, usually twenty-four hours. Don’t overfill your ice cream maker. Most machines work best when filled only two-thirds full, as the mixture expands as it freezes and incorporates air. For an even more intense chocolate experience, try using dark chocolate chips instead of semisweet.
Variations and Customizations
You can easily adapt this recipe to suit different tastes. For chocolate mint lovers, add two tablespoons of cocoa powder to the base mixture for a double chocolate mint version. Swap the chocolate chips for crushed cookies for a cookies and cream mint twist. Use white chocolate chips instead of dark for a sweeter, creamier variation. If you want to avoid food coloring entirely, the ice cream tastes exactly the same without it. For a dairy-sensitive version, substitute coconut cream for the heavy cream, though the texture will be slightly different.
Serving Suggestions
Serve this ice cream in classic waffle cones for a nostalgic summer treat. Layer it with hot fudge sauce and whipped cream for an impressive sundae. Sandwich it between two chocolate cookies for homemade ice cream sandwiches that disappear quickly. It pairs beautifully with warm brownies or chocolate cake, the temperature contrast making both components taste even better. For an elegant dinner party dessert, serve small scoops in chilled glass bowls with a sprig of fresh mint and a few chocolate shavings.
Storage and Freezing Tips
Store your ice cream in an airtight container in the freezer for up to two weeks, though it rarely lasts that long in our house. Press parchment paper or plastic wrap directly on the surface before sealing to prevent freezer burn. If your ice cream becomes too hard to scoop, let it sit at room temperature for about five minutes before serving. You can make this recipe up to a week ahead for parties or gatherings.
Recipe FAQs
Can I make this without an ice cream maker?
While an ice cream maker produces the best texture, you can freeze the mixture in a shallow pan, stirring vigorously every thirty minutes for about three hours to break up ice crystals.
Why is my ice cream icy instead of creamy?
This usually happens when the base wasn’t cold enough before churning, or the ice cream maker bowl wasn’t fully frozen. Make sure both are properly chilled before starting.
Can I use fresh mint instead of extract?
Yes, steep two cups of fresh mint leaves in the warmed cream mixture for thirty minutes, then strain before churning. The flavor will be more subtle and natural.
Common Mistakes to Avoid
Don’t skip dissolving the sugar completely in the base mixture, or you’ll end up with a grainy texture. Avoid adding the chocolate chips too early in the churning process, which causes them to settle at the bottom rather than distributing evenly. Never let the ice cream sit at room temperature too long before transferring it to the freezer, as this creates large ice crystals that make the texture less smooth.
Conclusion
As I write this, there’s a fresh batch of mint chocolate chip ice cream firming up in our freezer, and I can already imagine the look on my daughter’s face when she takes that first bite later tonight. This recipe has given us countless happy moments together, and I hope it does the same for your family. There’s pure joy in creating something this delicious from such simple ingredients.
Timing:
Prep Time: 10 minutes
Cook Time: No cooking required
Additional Time: 2 hours 30 minutes
Total Time: 2 hours 40 minutes
Servings: 8
Yield: 2 quarts
Nutritional Information (per serving)
Each serving contains approximately 437 calories with 29 grams of total fat, including 18 grams of saturated fat. You’ll get 72 milligrams of cholesterol and 180 milligrams of sodium per serving. The carbohydrate content is 44 grams with 42 grams of sugar and 1 gram of dietary fiber. Each serving provides 5 grams of protein, 120 milligrams of calcium, and 1 milligram of iron.
Your New Go-To Comfort Food Awaits
This easy mint chocolate chip ice cream will become your signature summer dessert, the one everyone requests again and again.
Easy Mint Chocolate Chip Ice Cream
Ingredients
Method
- Gather all your ingredients and a large mixing bowl. Combine the milk, heavy cream, sugar, vanilla extract, peppermint extract, and salt. Whisk everything together until the sugar completely dissolves. This usually takes about two minutes of steady whisking. You shouldn’t feel any grittiness when you rub a bit of the mixture between your fingers.
- If you’re using food coloring, add three drops of green coloring to your mixture and stir until the color is evenly distributed throughout. The mixture should be a pale, soft green that reminds you of early spring leaves.
- Pour your mixture into your ice cream maker and turn it on according to the manufacturer’s directions. Different machines work differently, but most will churn for about thirty minutes total. The mixture will start thin and gradually thicken as it freezes and incorporates air.
- About ten minutes into the churning process, once the mixture has started to thicken slightly, add your chocolate chips through the opening in the lid. The machine will distribute them throughout the ice cream as it continues to churn. If you add them too early, they’ll sink to the bottom. Too late, and they won’t mix in properly.
- Continue churning until the ice cream reaches a soft-serve consistency, thick enough that it holds its shape but still creamy and smooth. This typically takes another twenty minutes after adding the chocolate chips.
- Transfer your ice cream to an airtight, freezer-safe container. Press a piece of parchment paper directly on the surface to prevent ice crystals from forming. Freeze for at least two hours until firm enough to scoop properly.