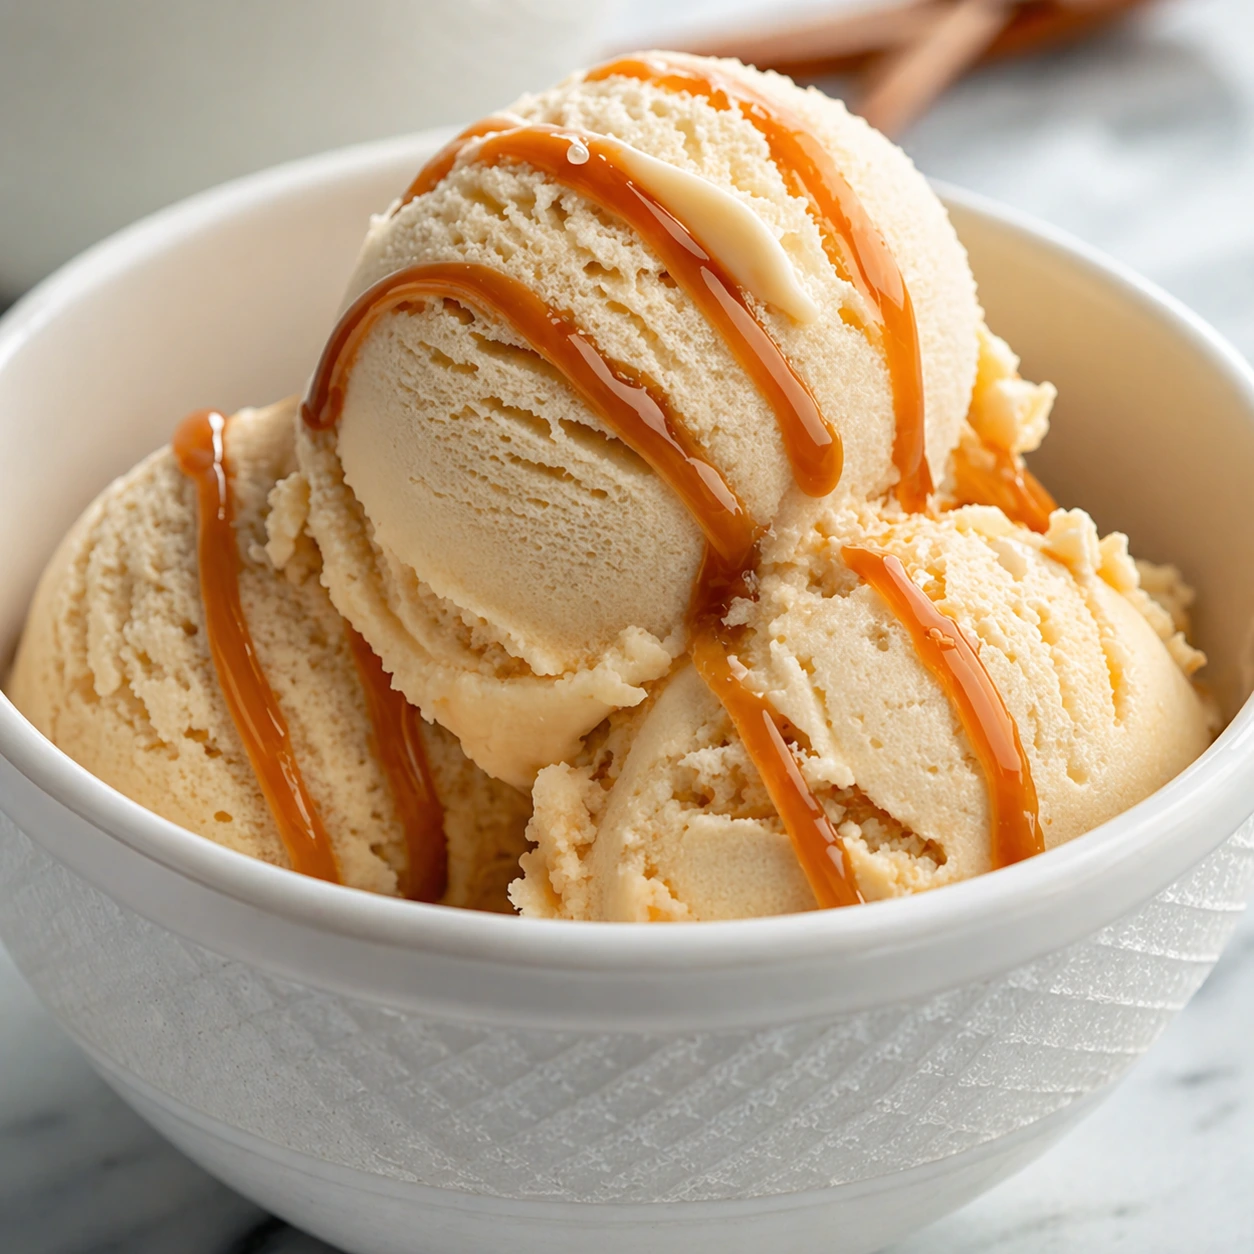
The late afternoon sun was streaming through my kitchen window last Saturday, warming the wooden countertops and making everything glow golden. Outside, the temperature had climbed into the low eighties, and I found myself craving something cold, sweet, and indulgent. My daughter had been asking for ice cream all week, but instead of driving to the store, I decided to make something special. I pulled out my ice cream maker, gathered butter and cream from the fridge, and started crafting the most luxurious caramel ice cream I’d ever tasted. The way the caramelized sugar filled the house with that toasty, butterscotch warmth made me think of my grandmother’s kitchen, where everything always smelled like comfort.
There’s something deeply satisfying about making ice cream from scratch. Maybe it’s the alchemy of watching cream and sugar transform into something silky and frozen, or perhaps it’s the pride that comes from serving a dessert you built entirely by hand. Either way, this caramel ice cream has become my most requested recipe. The flavor is rich without being cloying, buttery without feeling heavy, and the caramel threads throughout create little pockets of intense sweetness that make every spoonful exciting. It’s the kind of treat that turns an ordinary afternoon into a celebration.
Table of Contents
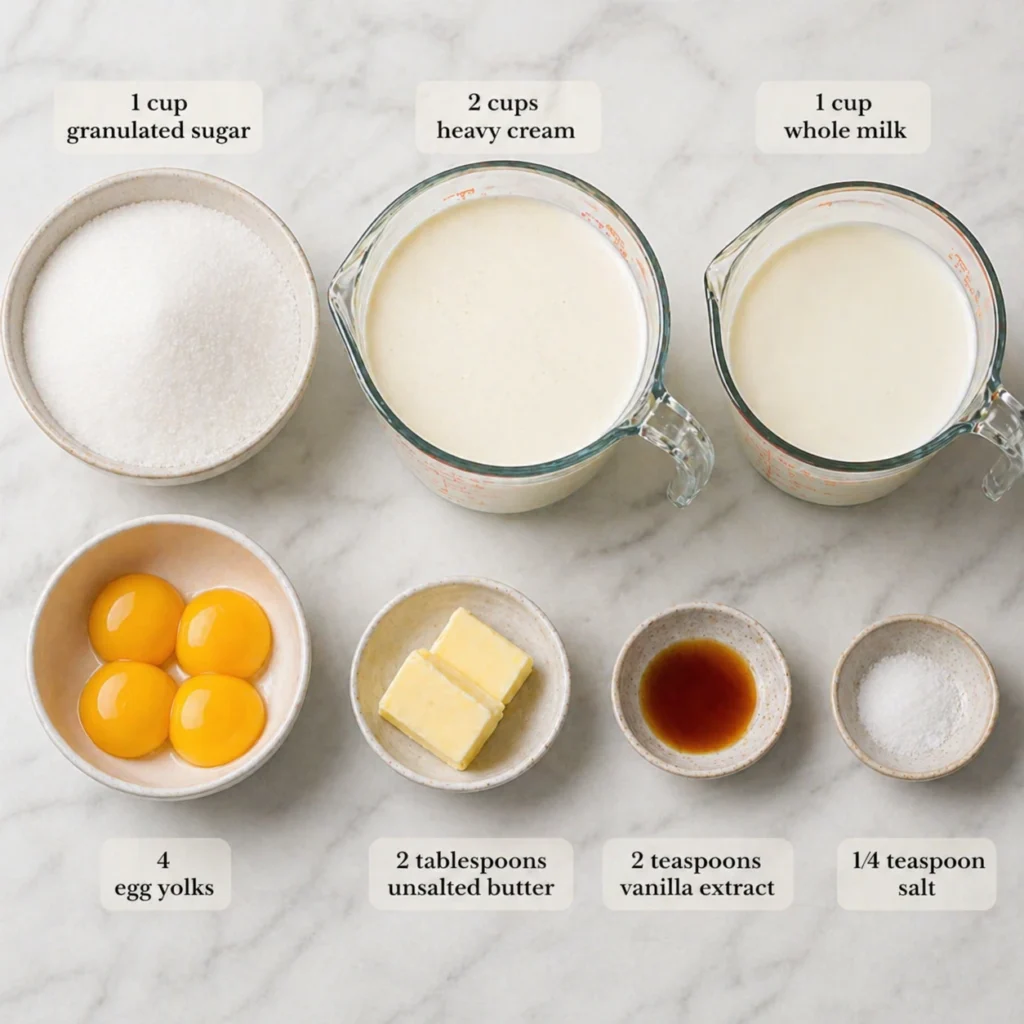
Essential Ingredients
- 1 cup granulated sugar
- 2 cups heavy cream
- 1 cup whole milk
- 4 egg yolks
- 2 tablespoons unsalted butter
- 2 teaspoons vanilla extract
- ¼ teaspoon salt
Preparation Steps
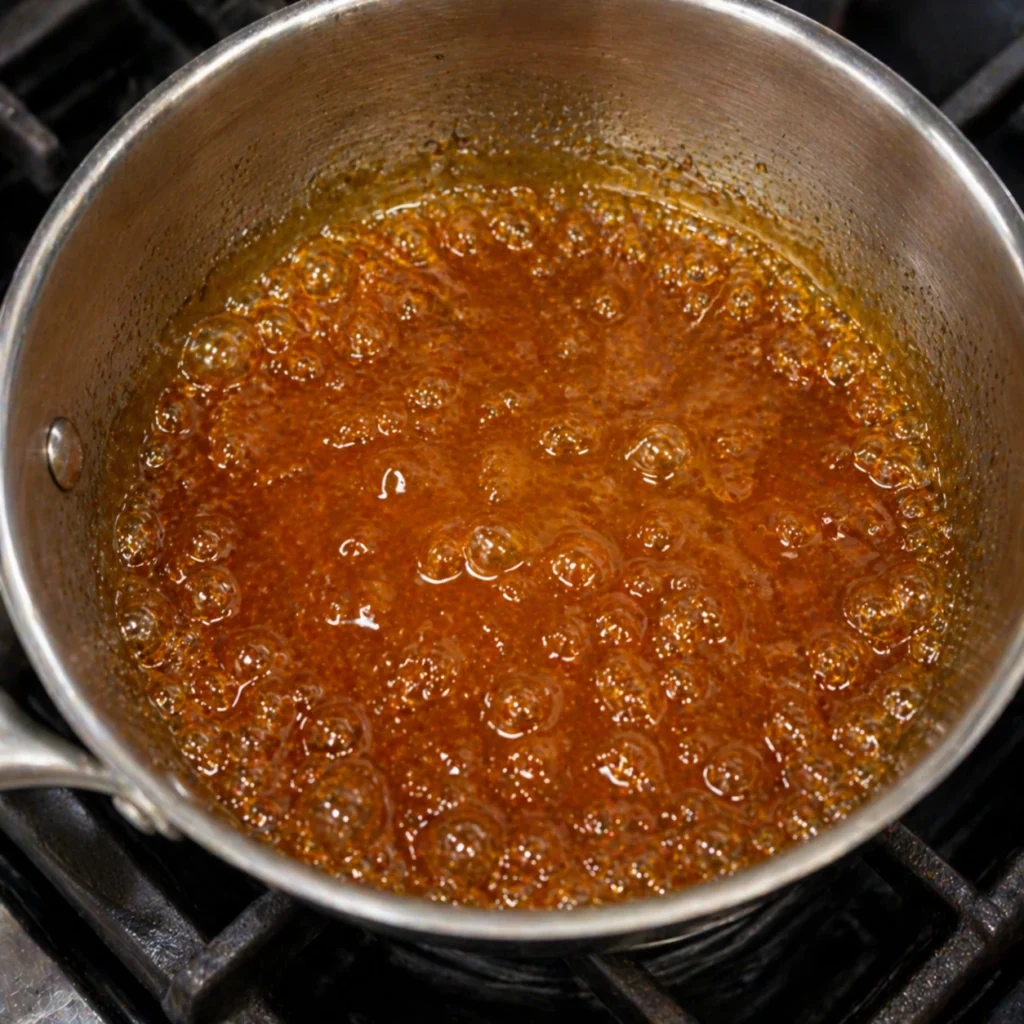
Make the Caramel
Start by heating sugar in a heavy-bottomed saucepan over medium heat. Don’t stir initially; just swirl the pan occasionally as the sugar melts and turns amber. This takes patience, usually around eight to ten minutes. Watch carefully because sugar can burn quickly once it starts browning. When it reaches a deep golden color and smells nutty and sweet, remove it from heat immediately.
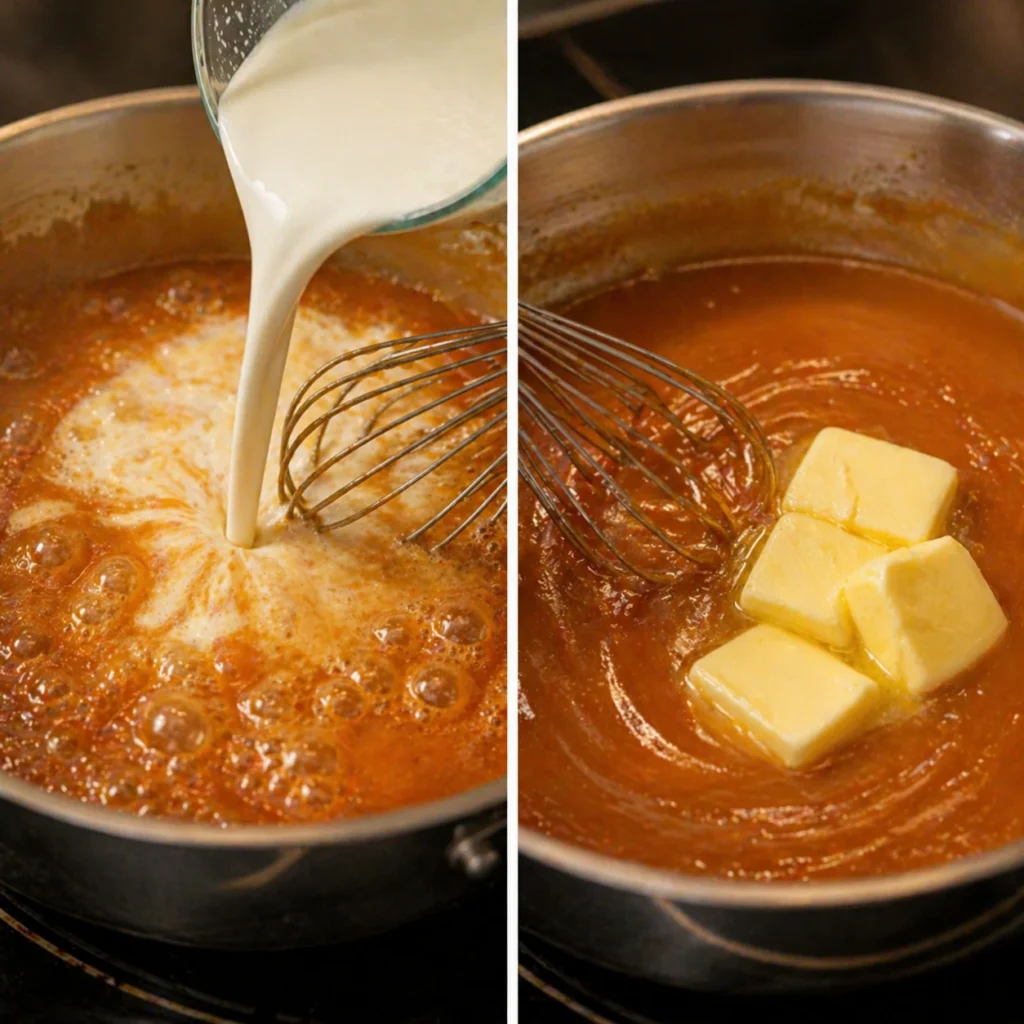
Add Cream and Butter
Carefully pour in the heavy cream while whisking constantly. The mixture will bubble dramatically, so stand back slightly. Once the bubbling subsides, add the butter and whisk until completely smooth. Return the pan to low heat if needed to dissolve any hardened sugar bits. Set this caramel mixture aside to cool slightly.
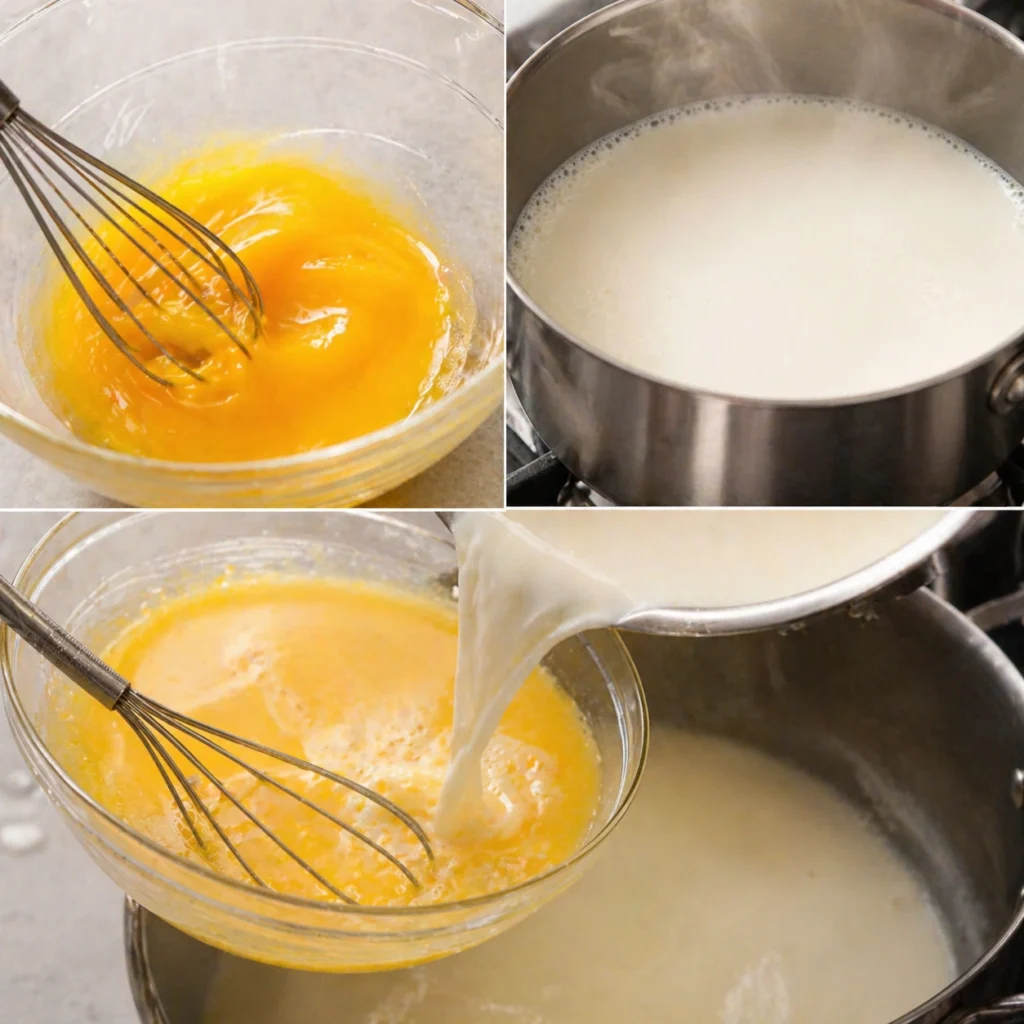
Create the Custard Base
In a separate bowl, whisk together egg yolks until smooth. Heat the milk in another saucepan until it just begins to steam. Slowly pour about half the hot milk into the yolks while whisking constantly. This tempering process prevents the eggs from scrambling. Pour the yolk mixture back into the saucepan with the remaining milk.
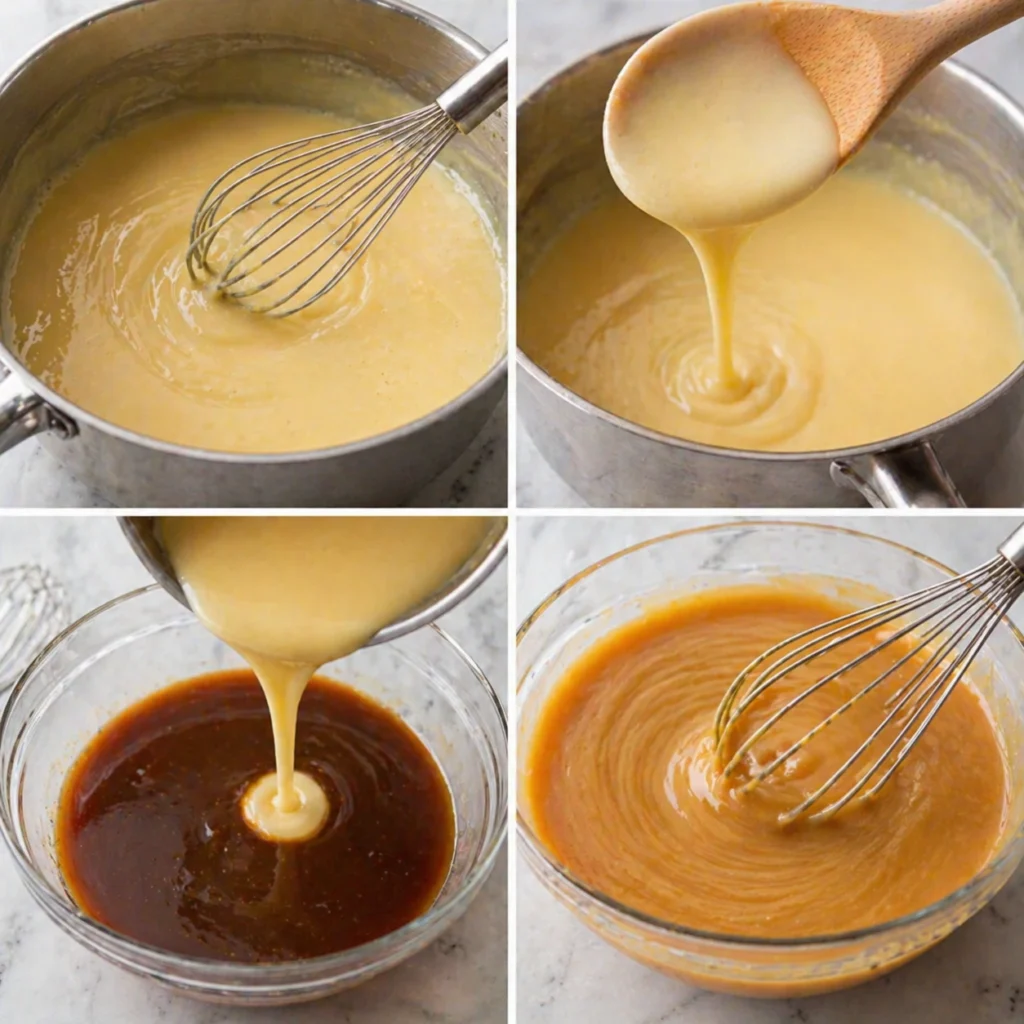
Combine and Cook
Cook the custard over medium-low heat, stirring constantly with a wooden spoon or silicone spatula. The mixture is ready when it coats the back of the spoon and reaches about 170 degrees Fahrenheit. Remove from heat and stir in the vanilla extract and salt. Combine the custard with your cooled caramel mixture, whisking until completely incorporated.
Chill and Churn
Strain the mixture through a fine-mesh sieve into a clean bowl to remove any cooked egg bits. Cover and refrigerate for at least four hours, or preferably overnight. The colder your base, the better your ice cream will freeze. Churn in your ice cream maker according to manufacturer instructions, usually twenty to twenty-five minutes. Transfer to a freezer-safe container and freeze for at least four hours before serving.
Why You Will Love This Recipe
This caramel ice cream delivers restaurant-quality results in your own kitchen. The flavor is genuinely sophisticated, with deep caramel notes that taste homemade rather than artificial. It’s perfect for impressing guests or treating your family to something extraordinary. The recipe is also surprisingly forgiving once you get the hang of making caramel. You’ll love how creamy and smooth the texture turns out, rivaling anything you’d buy at a premium ice cream shop.
Expert Tips For The Best Result
Use a candy thermometer when making caramel to catch it at the perfect moment before it burns. If your caramel hardens when you add the cream, simply return it to low heat and whisk until smooth again. Always chill your custard base thoroughly before churning; this dramatically improves the final texture. For extra caramel intensity, swirl in additional caramel sauce during the last minute of churning. Don’t skip the straining step, as it ensures silky-smooth ice cream without any lumps.
Variations and Customizations
Create salted caramel ice cream by increasing the salt to three-quarters of a teaspoon. Add toasted pecans or walnuts during the last few minutes of churning for delightful crunch. Swirl in ribbons of chocolate fudge sauce for a turtle-inspired variation. For coffee lovers, add two tablespoons of instant espresso powder to the custard. You can also create caramel swirl ice cream by layering scoops with extra caramel sauce as you pack the container for freezing.
Serving Suggestions
Serve this caramel ice cream in waffle cones for a classic presentation. Top with warm caramel sauce and crushed toffee bits for an over-the-top sundae. Pair it with warm apple pie or peach cobbler for the ultimate comfort dessert. It’s also stunning sandwiched between chocolate cookies or served alongside a slice of chocolate cake. For elegant dinner parties, serve small scoops in martini glasses with a drizzle of caramel and a sprinkle of flaky sea salt.
Storage and Freezing Tips
Store homemade ice cream in an airtight container with plastic wrap pressed directly against the surface to prevent ice crystals from forming. It keeps well in the freezer for up to two weeks, though it’s best enjoyed within the first week when the texture is optimal. Let the ice cream sit at room temperature for five minutes before scooping for easier serving. The custard base can be made up to two days ahead and kept refrigerated until you’re ready to churn.
Recipe FAQs
Can I make this without an ice cream maker?
Yes, though the texture won’t be quite as smooth. Pour the chilled custard into a shallow pan and freeze, whisking vigorously every thirty minutes for three to four hours until frozen.
Why did my caramel crystallize?
Crystallization happens when sugar crystals form during cooking. Avoid stirring the sugar as it melts, and make sure your pan is completely clean before starting.
Can I use store-bought caramel sauce instead?
You can, but homemade caramel creates a much richer, more complex flavor that’s worth the extra effort.
Common Mistakes to Avoid
Don’t rush the caramel-making process by using high heat, as this leads to burning rather than proper caramelization. Avoid adding cold cream to hot caramel, as the temperature difference can cause dangerous splattering; warm the cream slightly first. Never skip tempering the egg yolks, or you’ll end up with scrambled eggs in your custard instead of smooth, creamy ice cream.
Conclusion
Making this caramel ice cream brought me right back to those childhood summers when the ice cream truck’s jingle meant pure joy. Now I can create that same happiness in my own kitchen, sharing something truly special with the people I love. There’s magic in transforming simple ingredients into something this delicious, and I hope you feel it too when you make your first batch.
Timing
Prep Time: 10 minutes
Additional Time: 50 minutes
Total Time: 1 hour
Servings: 8
Nutritional Information (per serving)
Each generous scoop contains approximately 320 calories, with 22 grams of fat, 28 grams of carbohydrates, and 4 grams of protein. The richness comes primarily from the cream and egg yolks, making this a truly indulgent treat.
Your New Go-To Comfort Food Awaits
This caramel ice cream will become your signature dessert, the one everyone requests and remembers long after the last spoonful melts away.
Caramel Ice Cream
Ingredients
Method
- Start by heating sugar in a heavy-bottomed saucepan over medium heat. Don’t stir initially; just swirl the pan occasionally as the sugar melts and turns amber. This takes patience, usually around eight to ten minutes. Watch carefully because sugar can burn quickly once it starts browning. When it reaches a deep golden color and smells nutty and sweet, remove it from heat immediately.
- Carefully pour in the heavy cream while whisking constantly. The mixture will bubble dramatically, so stand back slightly. Once the bubbling subsides, add the butter and whisk until completely smooth. Return the pan to low heat if needed to dissolve any hardened sugar bits. Set this caramel mixture aside to cool slightly.
- In a separate bowl, whisk together egg yolks until smooth. Heat the milk in another saucepan until it just begins to steam. Slowly pour about half the hot milk into the yolks while whisking constantly. This tempering process prevents the eggs from scrambling. Pour the yolk mixture back into the saucepan with the remaining milk.
- Cook the custard over medium-low heat, stirring constantly with a wooden spoon or silicone spatula. The mixture is ready when it coats the back of the spoon and reaches about 170 degrees Fahrenheit. Remove from heat and stir in the vanilla extract and salt. Combine the custard with your cooled caramel mixture, whisking until completely incorporated.
- Strain the mixture through a fine-mesh sieve into a clean bowl to remove any cooked egg bits. Cover and refrigerate for at least four hours, or preferably overnight. The colder your base, the better your ice cream will freeze. Churn in your ice cream maker according to manufacturer instructions, usually twenty to twenty-five minutes. Transfer to a freezer-safe container and freeze for at least four hours before serving.